Monday, November 28, 2011

The Guest Bathroom

I have recently embarked on the journey that is redoing one of our guest bathrooms. Unfortunately, I don't have any before pictures (sad, I know) but for those of you who have seen it before, it was really bad. Picture in your mind's eye an art deco mish mash wallpaper of black and white zig zags and gray and red lilies, not unwholly like this:
Pretty bad, right?
Add to this a bright red counter top with black (dirty) sinks:
Now throw in gray floor tiles, glass bricks, and a black toilet and bathtub and you get one hot mess of an ugly bathroom.
The first step to rehabilitation was to remove the wallpaper, which wasn't too hard considering the 20+ years the shower has been steaming it off. Next, texture and paint: we watered down joint compound and slathered it on the wall, then made circular motions with a texture brush (<$15 at Home Depot).
The big job though, was the counter tops. I played around with a few ideas and finally came up with my solution. First, remove any caulking and sand the counter to give it some tooth. Next, I painted mine black with a craft acrylic because I didn't want any chance of red showing through (I taped off around the counter first, but not around the sinks because I wanted to get right up next to them with the black). 
Here it is after two coats.
Much better, but not quite done yet!
Next, I taped off the sinks and sprayed on a textured, stone-like spray paint.

Here's the counter after one coat.
One more coat takes care of most of the splotchy-ness. 
A couple of touch ups and 3 coats of  Spar-Urethane later, and this is what we got:


The whole counter project cost about $20. What do you think?

Tuesday, November 22, 2011

Lochlan's Room

This post has been a LOOONG time in the making. I started redoing Lochlan's room many months ago, but haven't had the time or bandwidth to upload the photos of the befores, durings, and afters until now...ok, maybe I had the time, but I was just lazy.

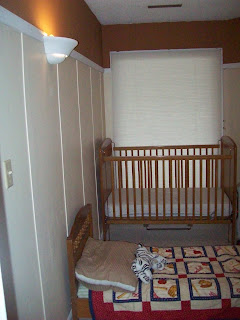
Ok, I wanted Lochlan's room to be cute enough for a nursery, but be neutral enough to either grow up with him, or become a guest room or office later. I still don't have any curtains or some of the furniture I want to put in there (like a kid-sized table and chairs and a rocking or gliding chair for me), but I think you can get the gist of the idea.

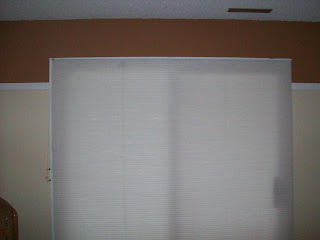
 The first pic is the before. Notice the super ugly wallpaper. You can't tell from this, but that border has pictures of stamps, and maps, and weird foliage.

 So, I didn't want to remove the wallpaper if I didn't have to, so I mudded and sanded the seams with joint compound. Next time, I'll probably skip the mudding and just sand the paper down at the seams.
 Lochlan snuck in to play in his new room.
 After I prepped the seams, it was time to prime (hey, I made a rhyme! There I go again!). I went with an oil-based primer for a couple of reasons 1)The smell. The room had this sort of musty smell that I"m pretty sure was IN the wallpaper and since I didn't want to remove it, I wanted the primer to be able to really seal that scent so it wouldn't escape back into the room. 2) Because it's oil-based it didn't soak into the wallpaper and loosen it like latex would have so there weren't any bubbles or peeling going on as we were painting or after, so it really "glued" the paper to the wall. And, lucky for me, you can paint over oil-based with latex, but not the other way around.
 Then we painted the upper area of the wall a darker than average, but not too dark brown.

Between this and the next picture, we painted the bottom section of the wall Antique White and I cut some strips of 1/8 inch tempered hardboard (one sheet is less than $10 at Home Depot). I painted those the Antique White color and spaced them out every 2 feet. I was going for a board and batten look. Jaren nailed those on and added a chair rail to finish it off.


I also got these wooden letters to line up around the chair rail to help Lochlan learn his ABCs!


Monday, November 21, 2011

Thanksgiving already?

Thanksgiving is this week and I'm in charge of the turkey this year. Since the main event of the meal is on my shoulders, I decided that I should probably be able to see inside my oven without opening it so I can check on the turkey without letting out all of the heat. Enter my dirty oven:
The oven door that I need to see through:

Gross, right? Don't judge.
So I heard about a quick and easy way to clean your oven involving a baking soda and water paste and about 20 minutes. I decided to give it a shot.


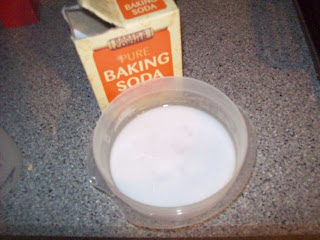
Pour baking soda into a dish and add enough water to make a thin paste.

Spread your paste all over the inside of your oven and let it sit for 15 to 20 minutes. When the time was up, I lightly scrubbed everything with an old dish brush just to loosen things up and then I wiped it down with a wet rag (it was helpful to have a container of hot water nearby to rinse the rag in). Then I got a new rag and new water and gave it a final "rinse" to get any baking soda residue off.

Nice, huh? And look, I can even see through the window!